Creating events for others
Location Administrators and Account Administrators are able to create events for other educators or a group of other educators.
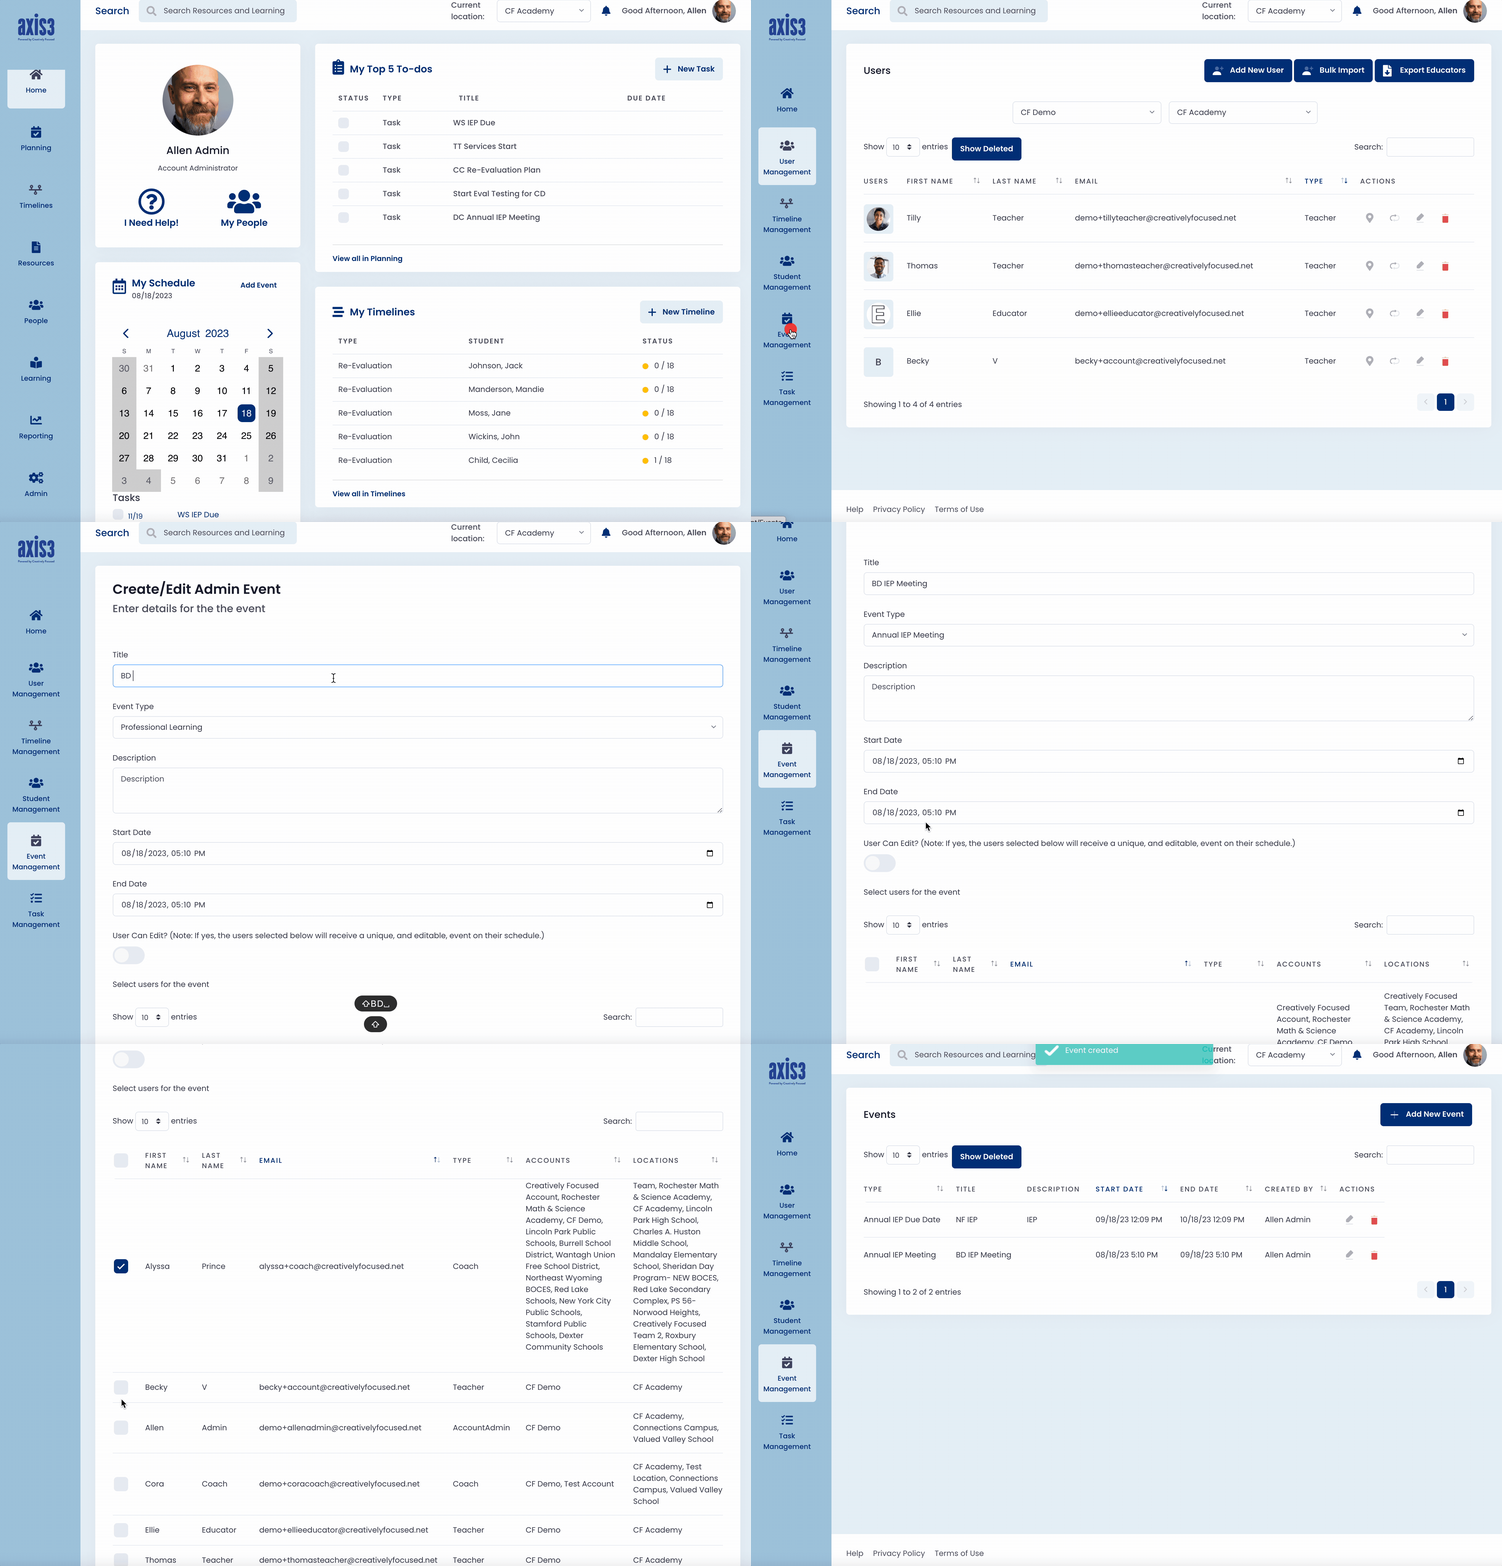
Step 1 (of 6): Select "Admin" from the left navigation menu.
Step 2 (of 6): When the left navigation menu refreshes, select "Event Management".
Step 3 (of 6): Select "+Add New Event" from top right on page.
Step 4 (of 6): Enter the event details (title, event type, description, start date and time, and ending date and time.
TIP: You can use the calendar icon to the right of the start date and time or end date and time to select the date from a calendar.

Gif showcasing setting the start and ending date and times for event
NOTE: The default setting for these events is to be uneditable by the selected users. If you would like other users to be able to edit the event on their calendars, Click on the button below "User Can Edit?". The circle in the bar will move from the left to the right and the color change from grey to blue. You can adjust this setting at anytime.
Step 5 (of 6): Select the users for the event from the user list at the bottom of the page.
TIP: If you have a long list of users, you can sort users by first name, last name, email address, type (role), account, and location to quickly locate users.
Step 6 (of 6): Once you have all of the users selected, select "Submit" from the bottom of the page.

Gif showcasing selecting Add Event, selecting users, and clicking Submit
