Adding custom resources in your district folder
Educators on axis3 whose account has custom resources enabled are able to upload their own resources to their axis3 resource library. Coaches, Location Administrators, and Account Administrators are also able to upload resources that they share with others in the location.
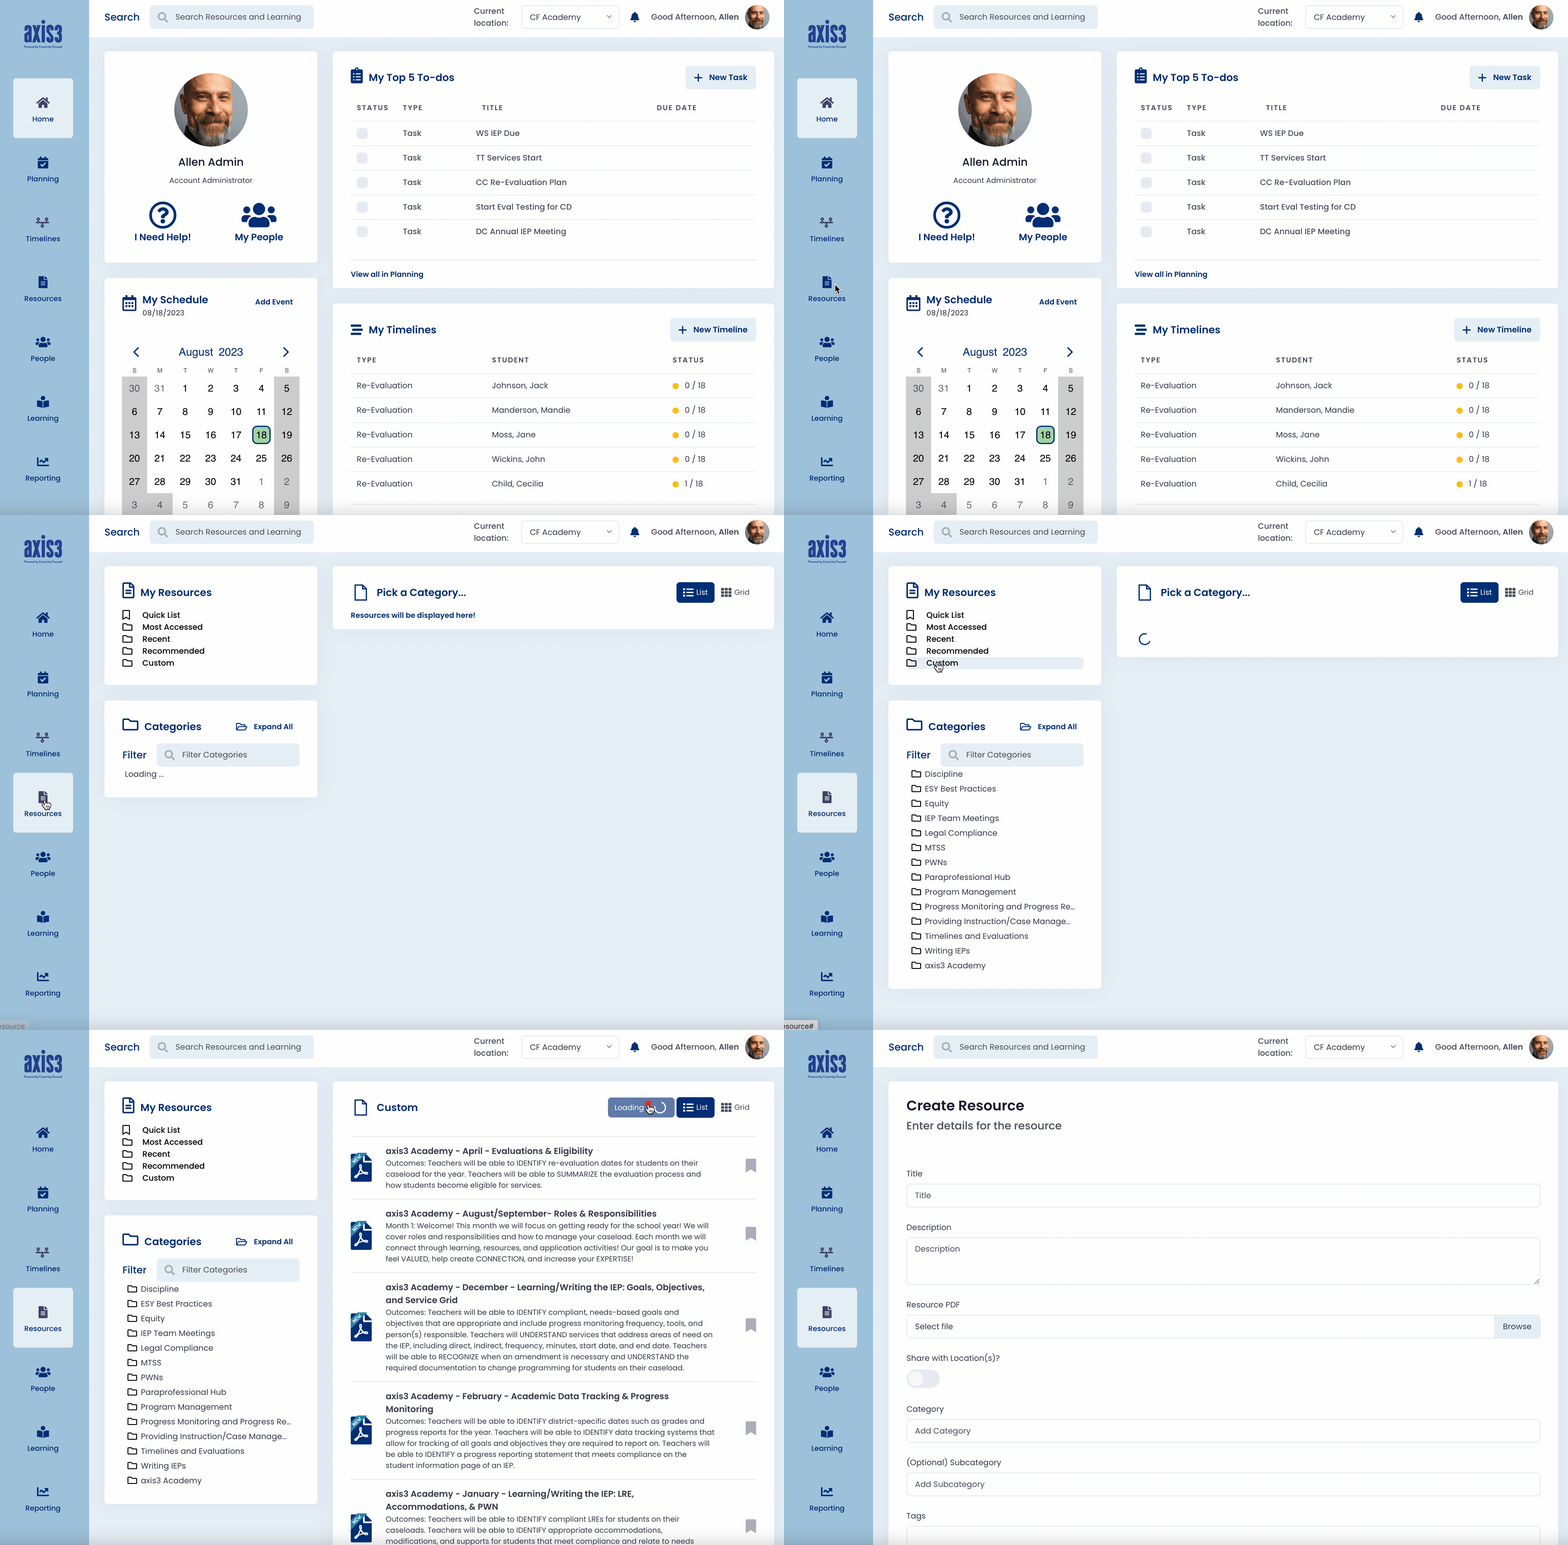
Step 1 (of 7): Navigate to the Resources page by selecting "Resources" from the left navigation menu.
Step 2 (of 7): Select "[District Name]" from the list under My Resources.
Step 3 (of 7): Select "+Add" from the top right of the Custom Resource Area.

Gif showcasing steps 1 through 3
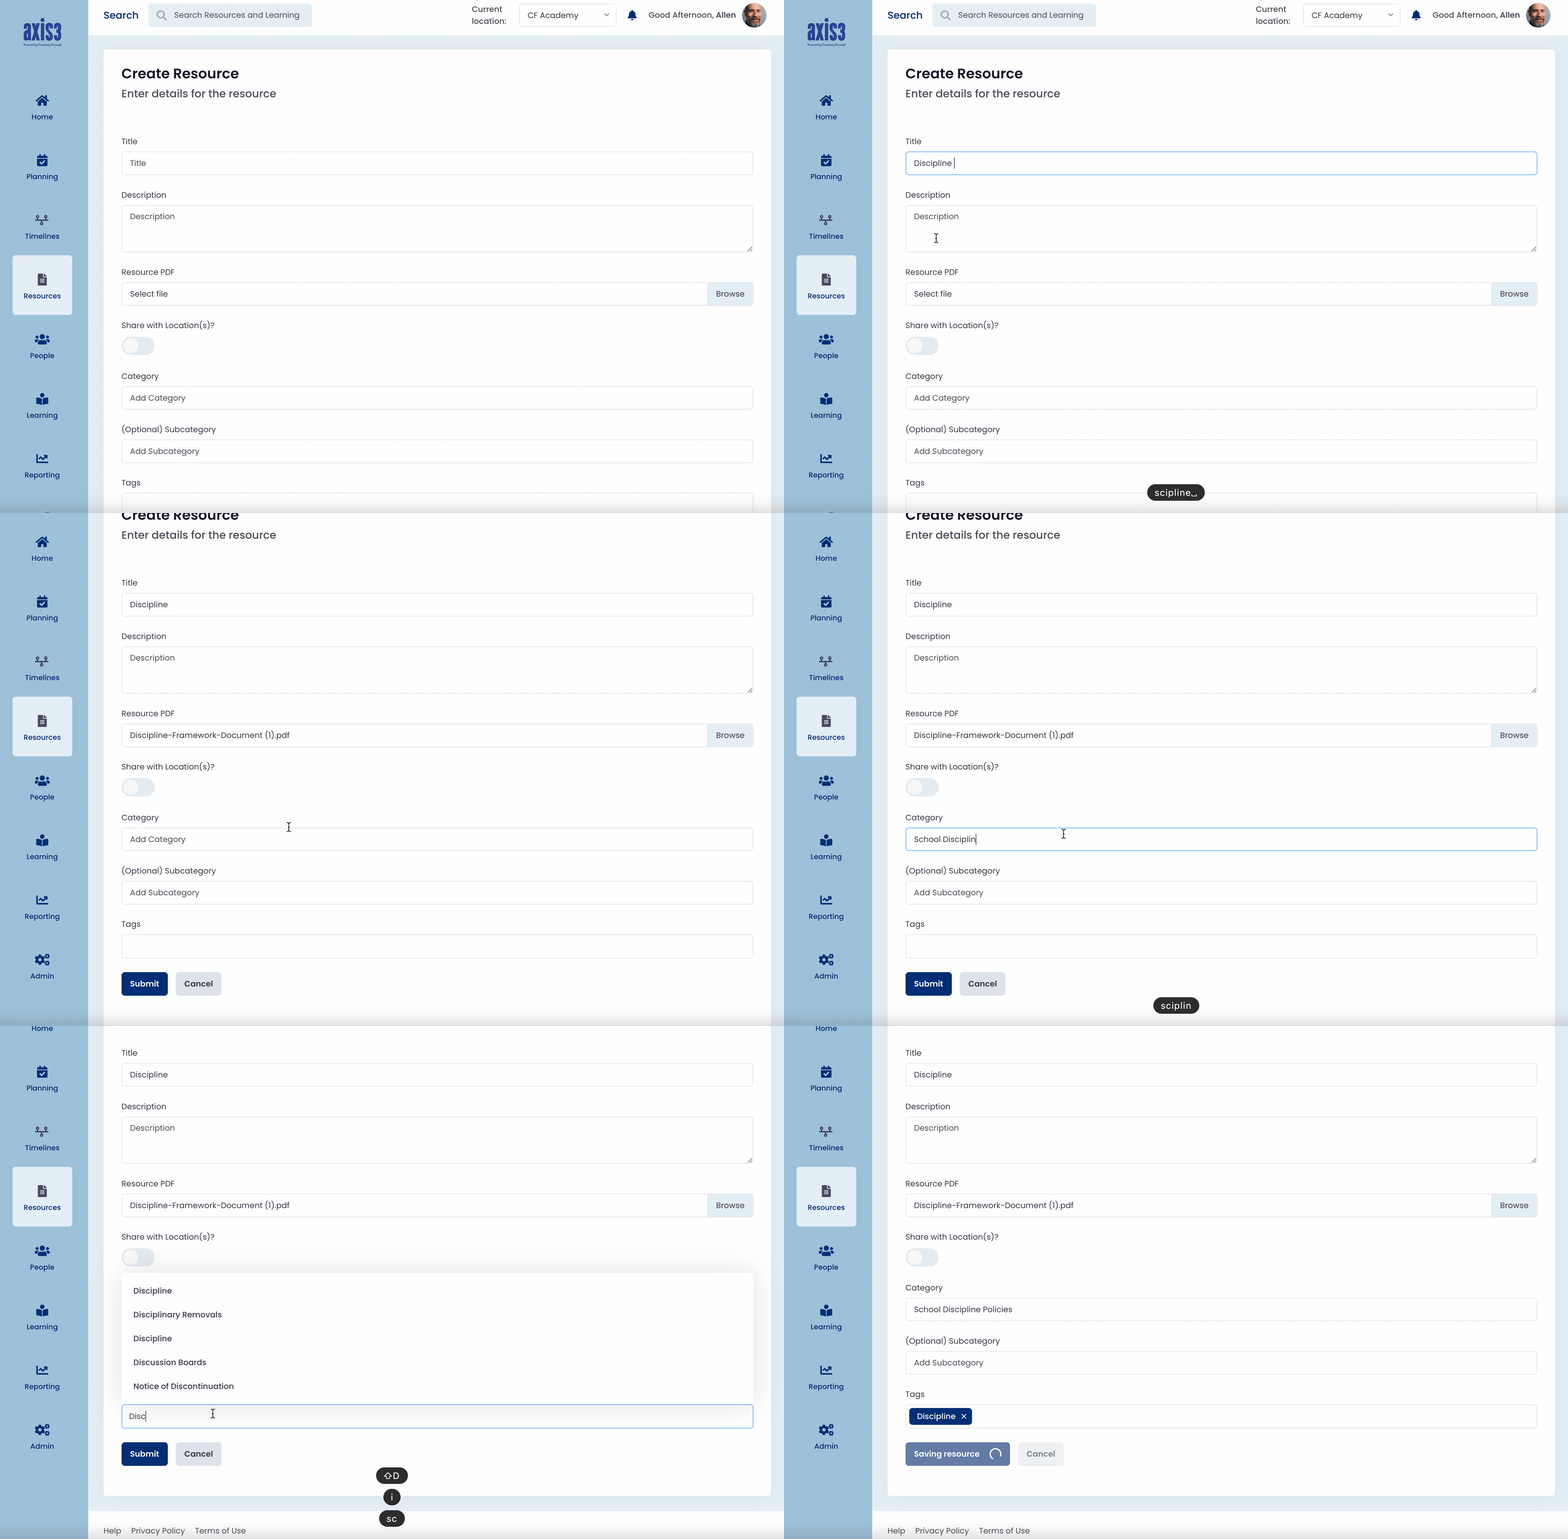
Step 4 (of 7): Enter the resource title and description.
NOTE: If you are a coach, location administrator, or account administrator and want the resource to be shared with your location, select the button under "Share with Location(s)?". Once it is selected, The circle in the oval will move from the left to the right and the color will turn from grey to blue. If you have more than one location associated with your account, you will be prompted to select the location or locations you would like to share the custom resource with.
Step 5 (of 7): Upload the resource by selecting "Browse" and clicking on the pdf resource from your files.
TIP: If a resource in your files is not available for upload, check to make sure it is in PDF format.
Step 6 (of 7): Add a category. You also have the option of adding a subcategory. Enter any tags you want to be associated with this resource.
Step 7 (of 7): Select the "Submit" button at the bottom of the page.

Gif showcasing steps 4 through 7
