Creating and completing timelines for yourself
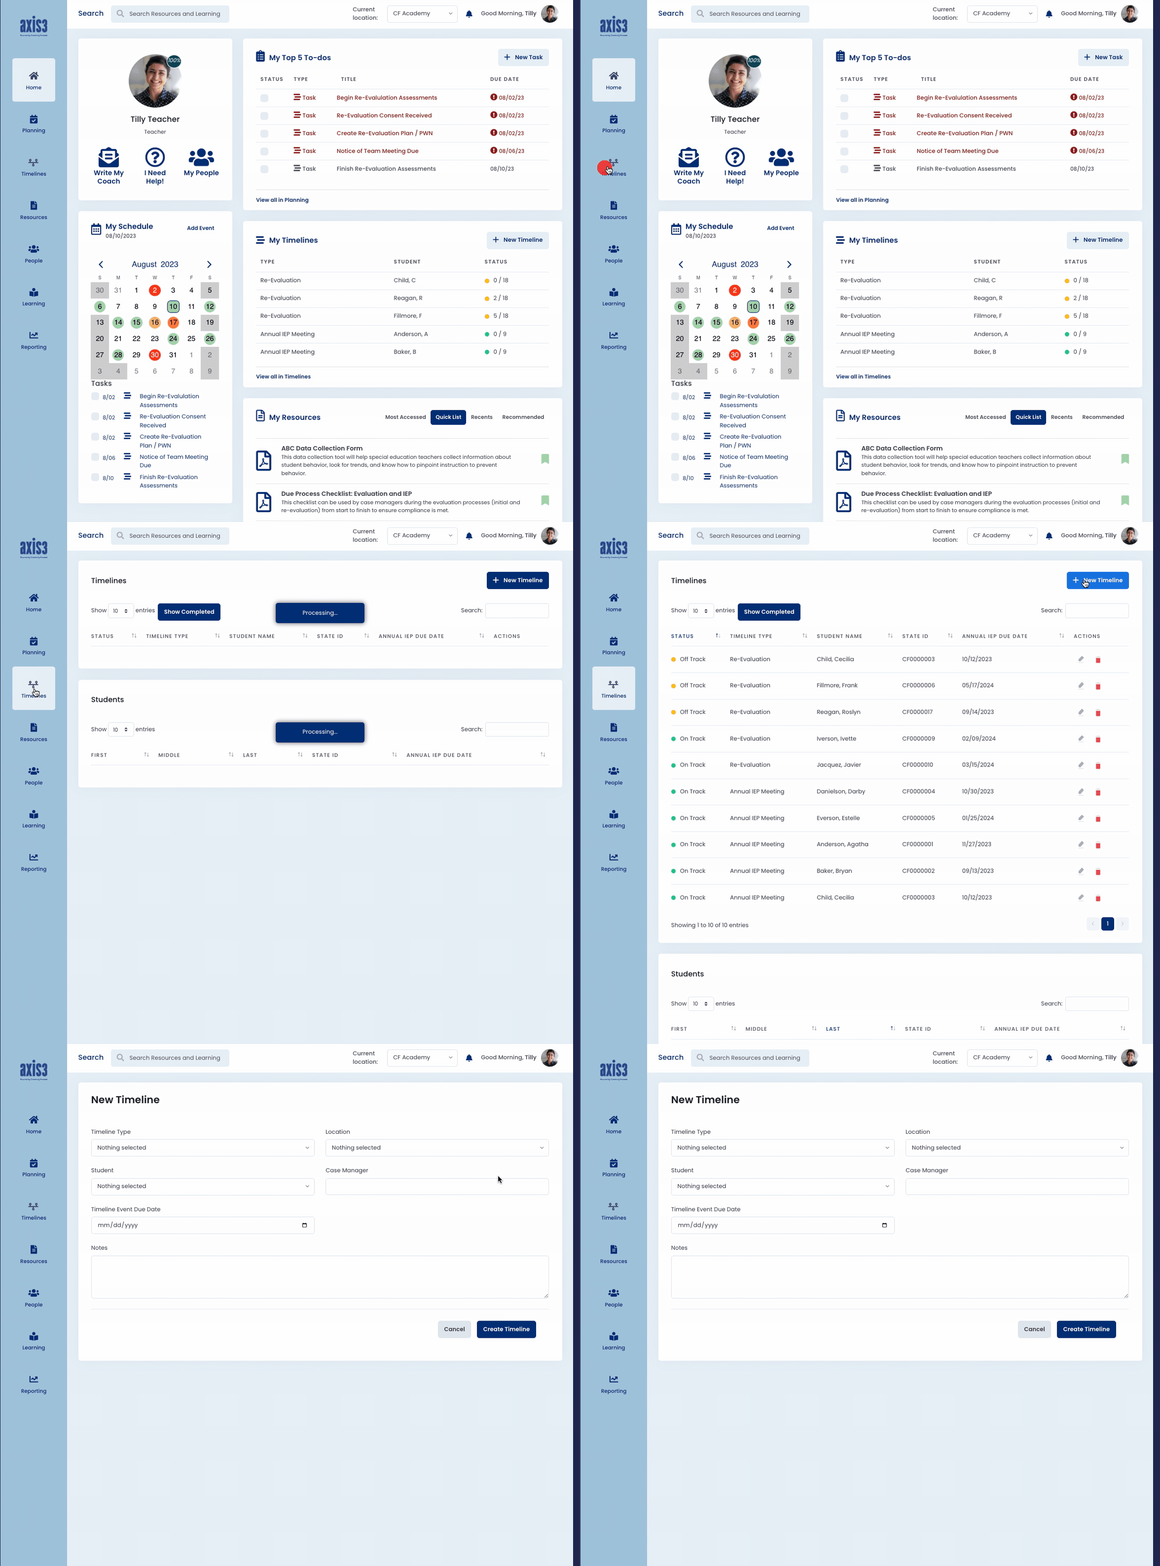
Step 1 (of 4): Select "New Timeline" on your Home page or Timelines page.
NOTE: Location Administrators and Account Administrators can create Timelines for other educators. Teachers and Coaches can create Timelines for themselves.

GIF showcasing selecting "New Timeline"
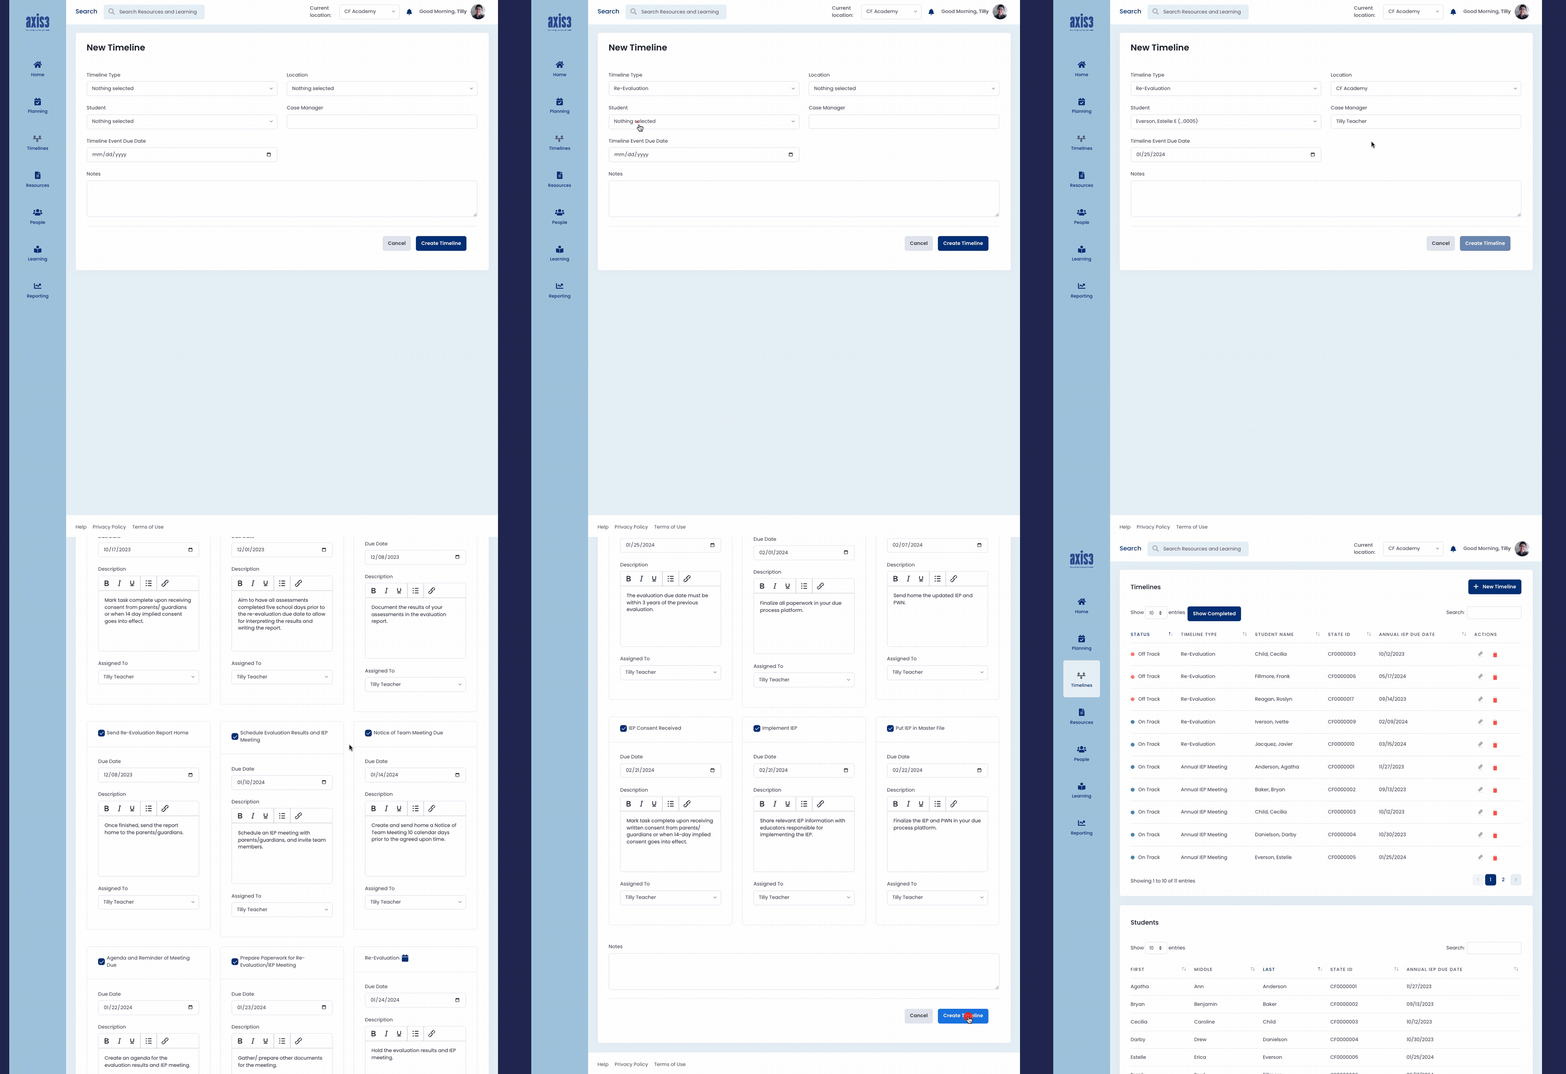
Step 2 (of 4): Select the Timeline Type, the student's school location, and the student. If the student's annual IEP due date or reevaluation due date does not auto-populate, select their due date.
Note: Timelines currently support Annual IEPs and Re-evaluations. From the Timeline Type dropdown, choose your custom District Timeline.

GIF showcasing selecting Timeline details
Step 3 (of 4): Review the Timeline tasks and events, adjust dates and descriptions as needed, and assign tasks to other educators if applicable. Click "Save".
GIF showcasing creating a Timeline

TIP: To ensure Timeline dates are accurately calculated, your school's calendar should be uploaded to axis3 prior to creating Timelines. Contact your Customer Success Consultant for assistance.
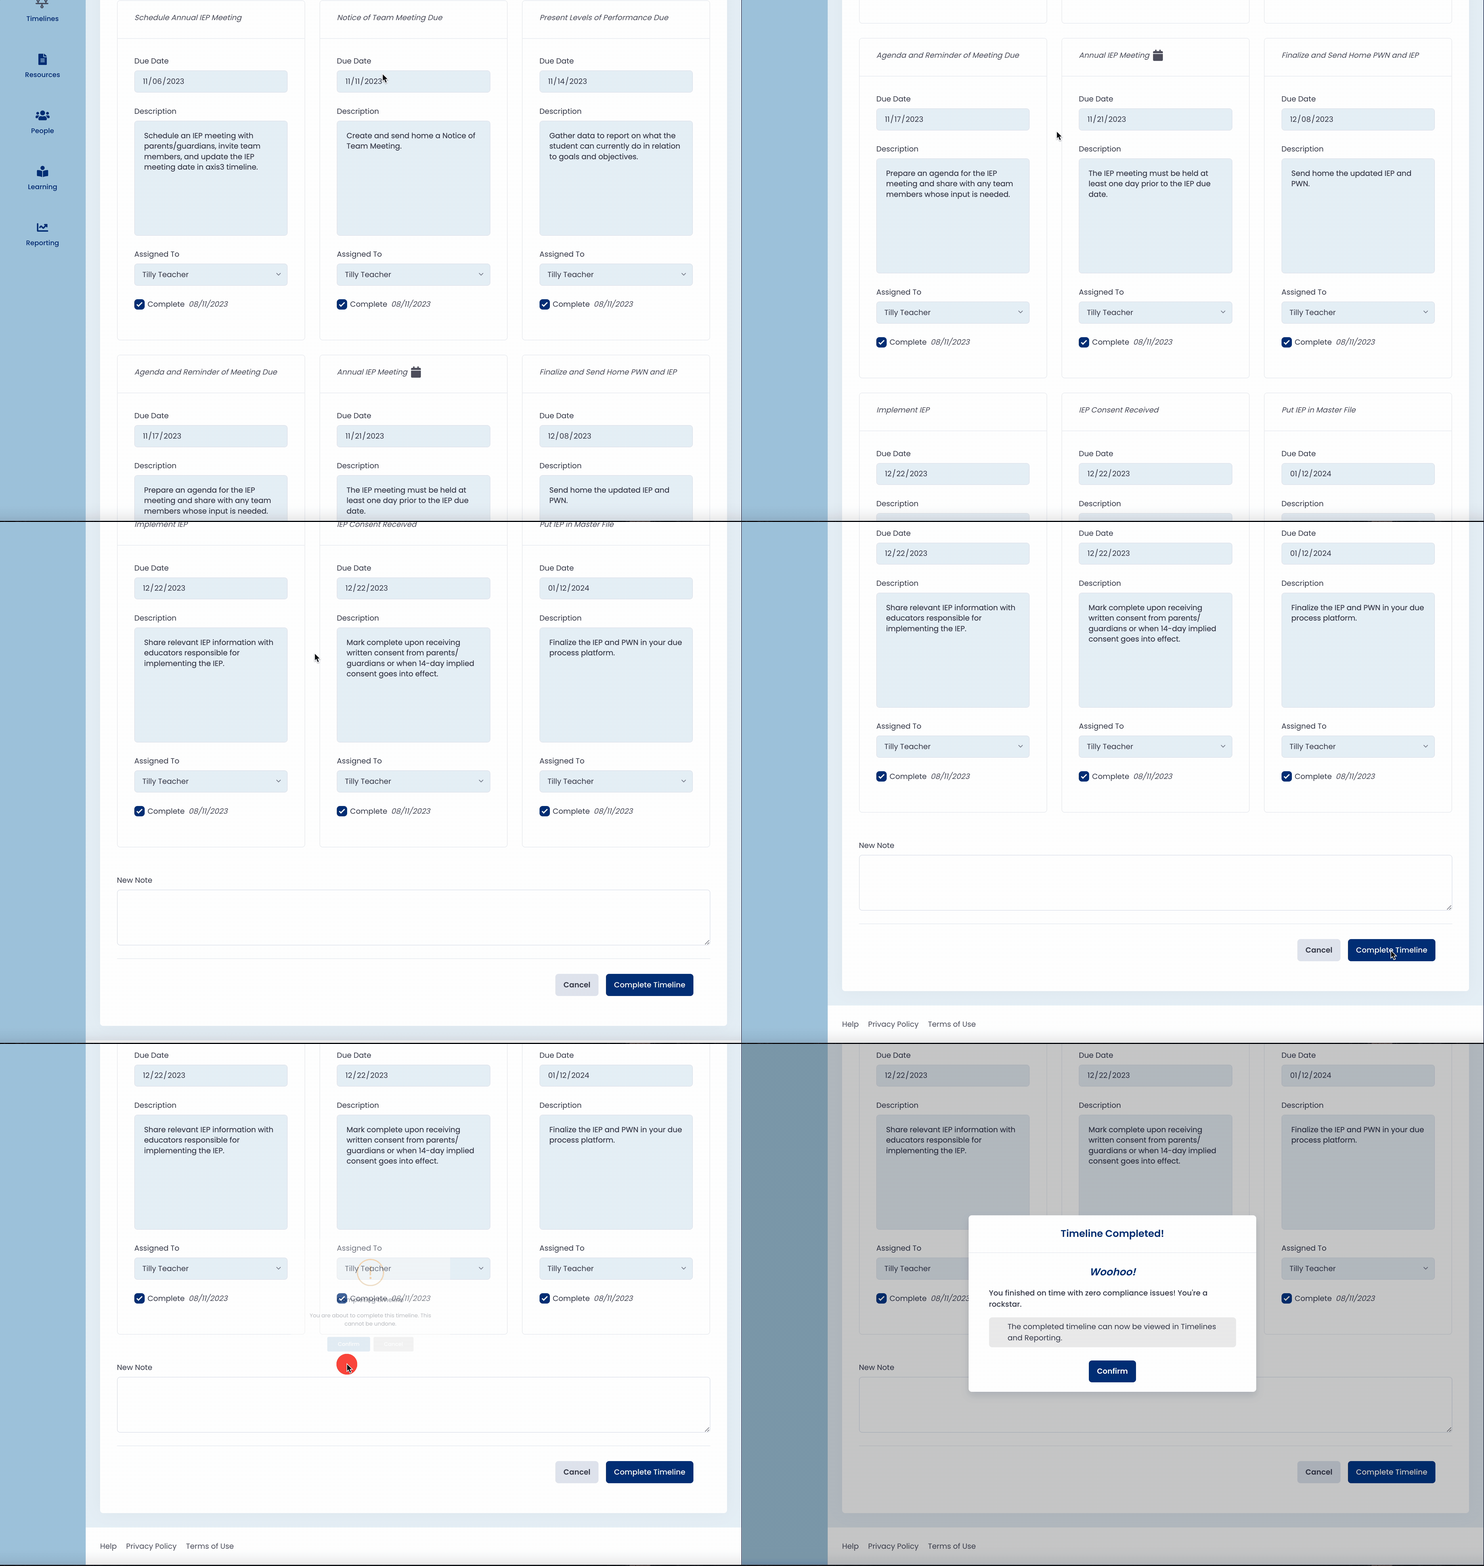
Step 4 (of 4): Once all of the tasks have been completed, scroll to the bottom of the page and click "Complete Timeline" then click "confirm".

