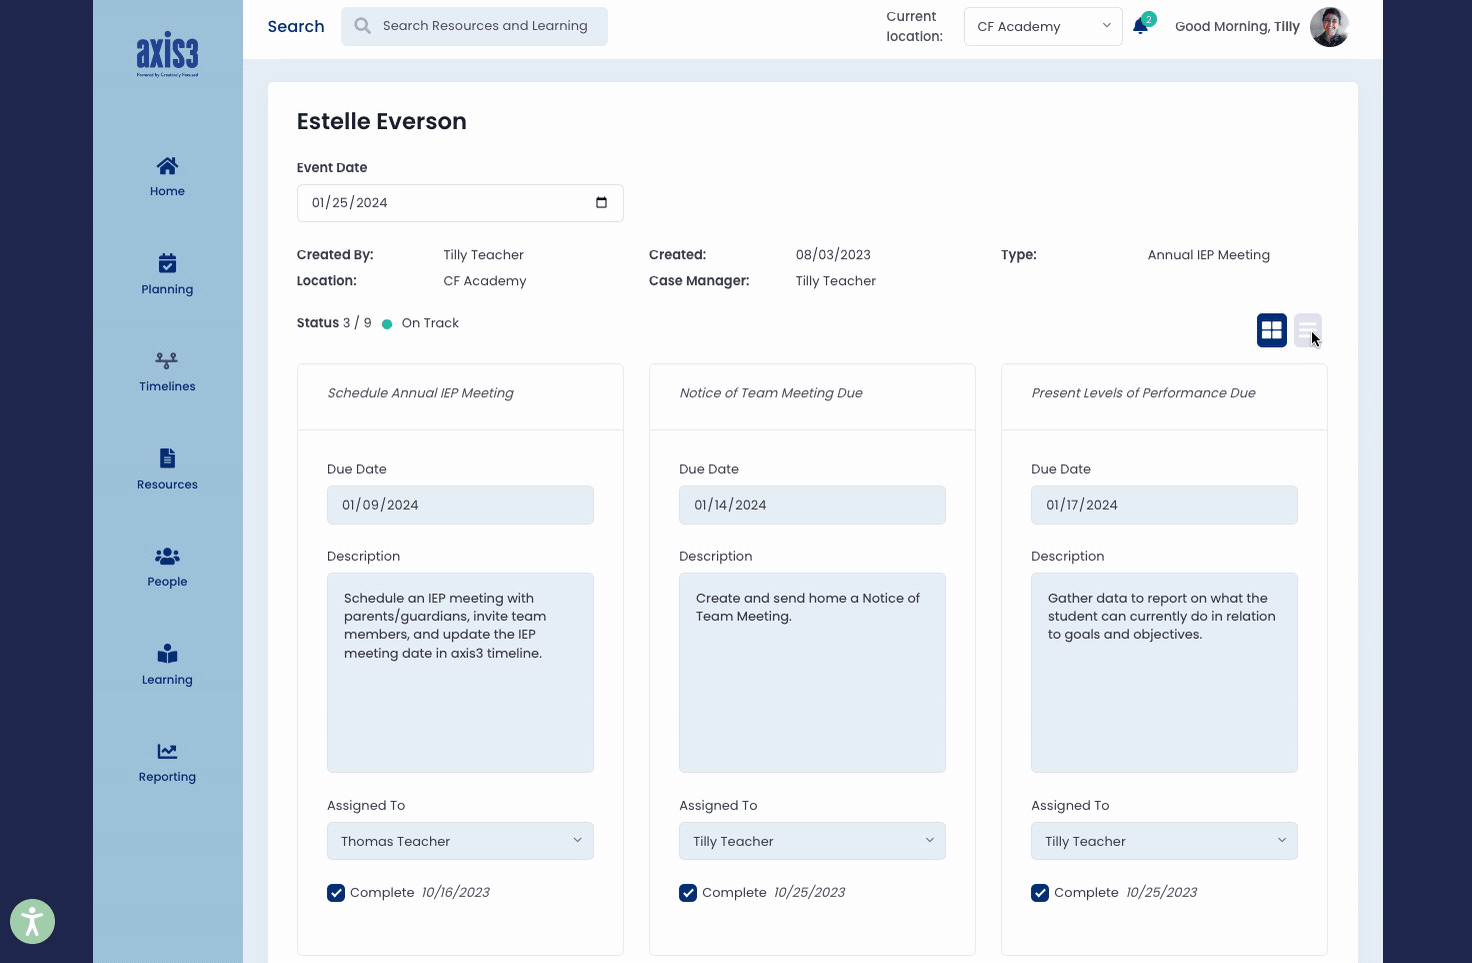
Once you have created a Timeline, you can manage it from the Timeline page.
Step 1 (of 4): Navigate to your Timeline page.
Step 2 (of 4): Select the Timeline you want to edit.
Step 3 (of 4): Check off tasks, edit dates, update descriptions, add notes, and change who the task is assigned to as needed.
Step 4 (of 4): Click the "Save" button.
NOTE: Event and Task due dates are determined by the due date entered when creating the Timeline. The workflow of events and tasks contingent on the due date can be updated by changing the date at the top of the Timeline or by changing the IEP Meeting due date. Due dates for all events and tasks can also be manually updated.
GIF showcasing the process for editing a Timeline
Changing the Timeline View
You can view your Timeline as a Grid or a List.
GIF showcasing the toggling between grid and list view.